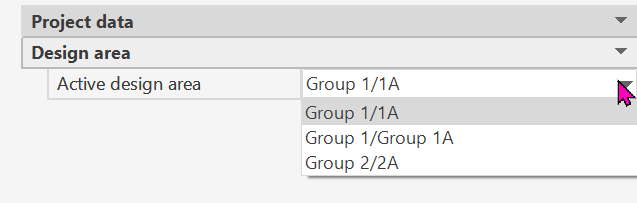
Design area
Icon:

Function: Move the sprinkler toward the design area and/or move it away from the design area.
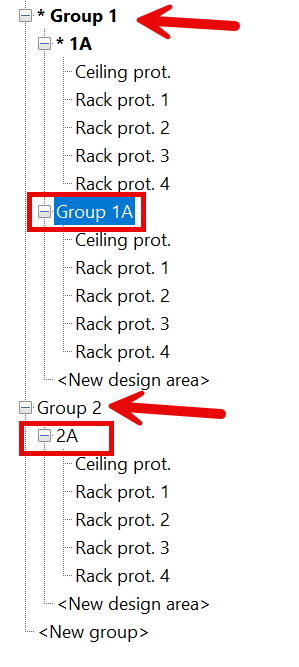
After executing the command, the following input options appear in the Properties palette, depending on the Groups and Design Areas created in Project Management:
Each selected sprinkler is assigned to the design area with the specified group/number.
The data can be modified at any time during the command process.
Newly entered sprinklers are not included in the design area by default; that is, unless this function is called, none of the sprinklers are in the design area. They can also be assigned or deselected directly in Project Management via “Select Sprinklers.”
In Project Management, a sprinkler can be assigned to multiple design areas. This can also be done using this tool.
Example:
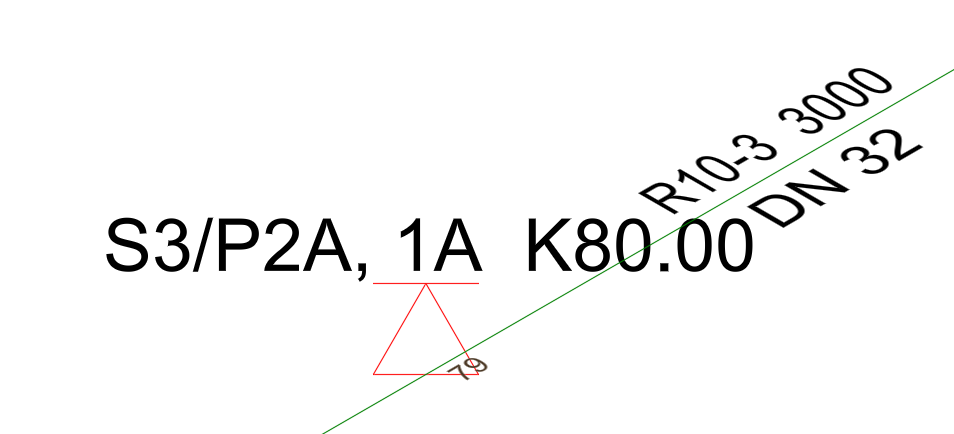
This sprinkler is located in design area 1A and 2A, even in different groups.
The following option line appears in command line:

To select elements (see Select/Modify Components).
The sprinklers are activated in Project Management via the parent active zone.
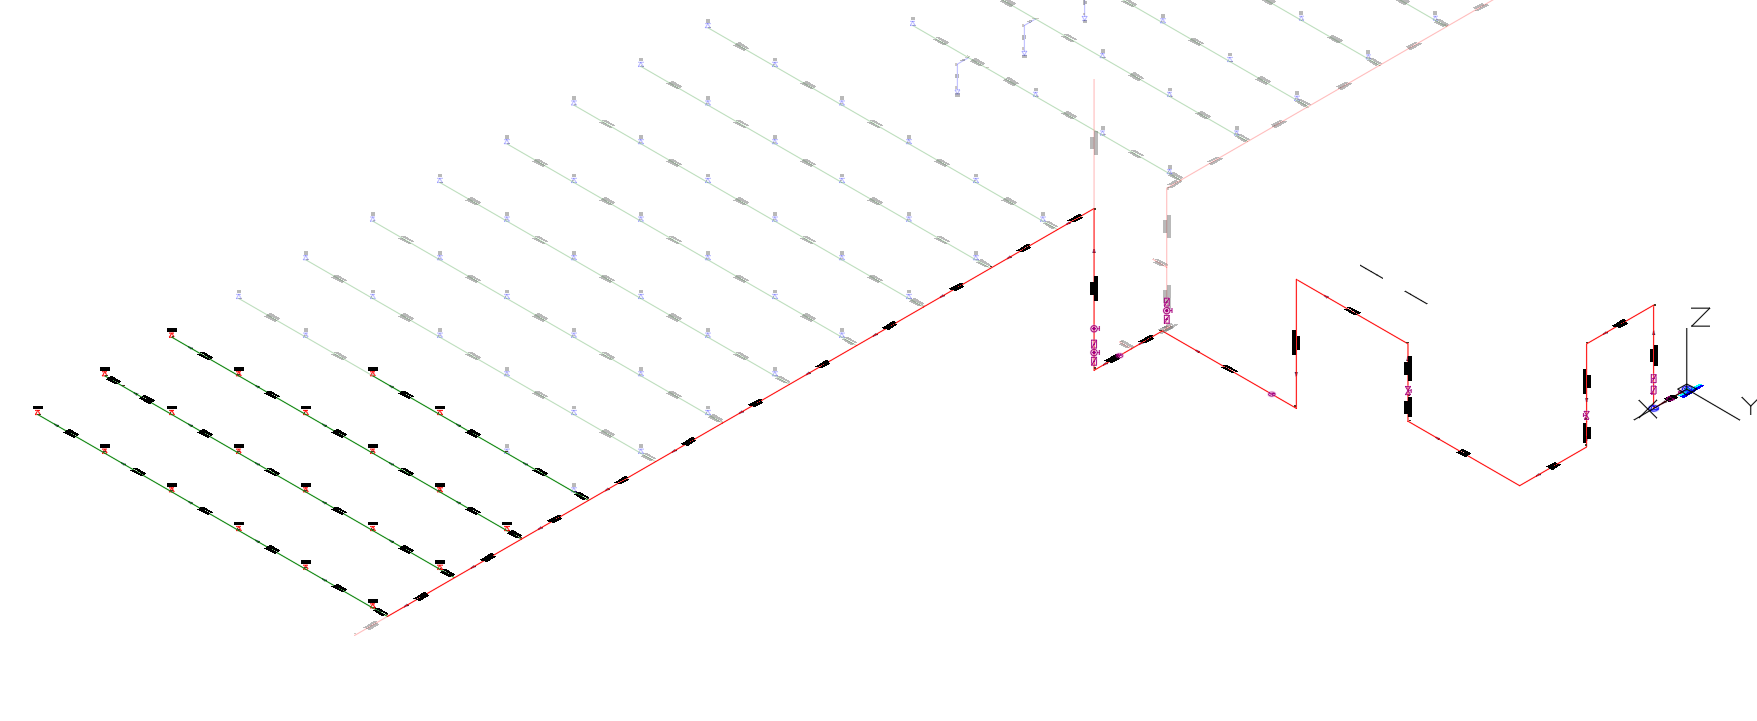
The sprinklers are then displayed in red and are ready for calculation.
Conversely, if these sprinklers are to be removed from a zone, they have to be deselected in Project Management.
The color changes again.
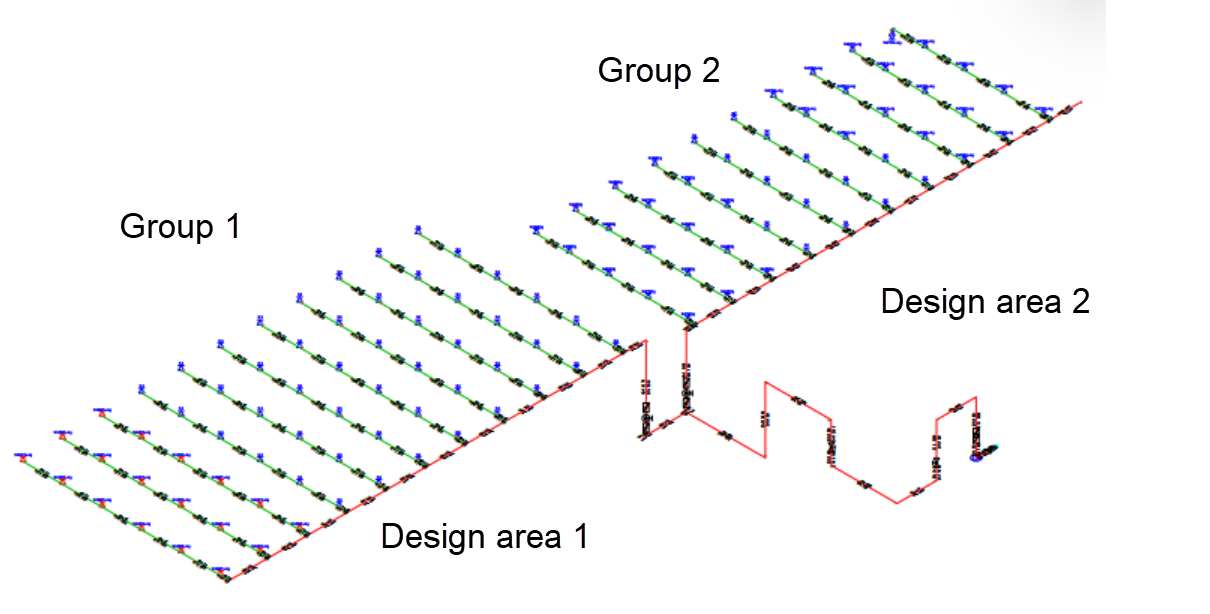
If there are 2 alarm valve stations with 2 networks to be calculated in one file, you can calculate them in the same file and assign the respective groups in Project Management by assigning different numbers to the design areas to be calculated.
Example:
The sprinklers marked in red are now assigned to Design area 1 and can be activated via Project Management/Design areas.
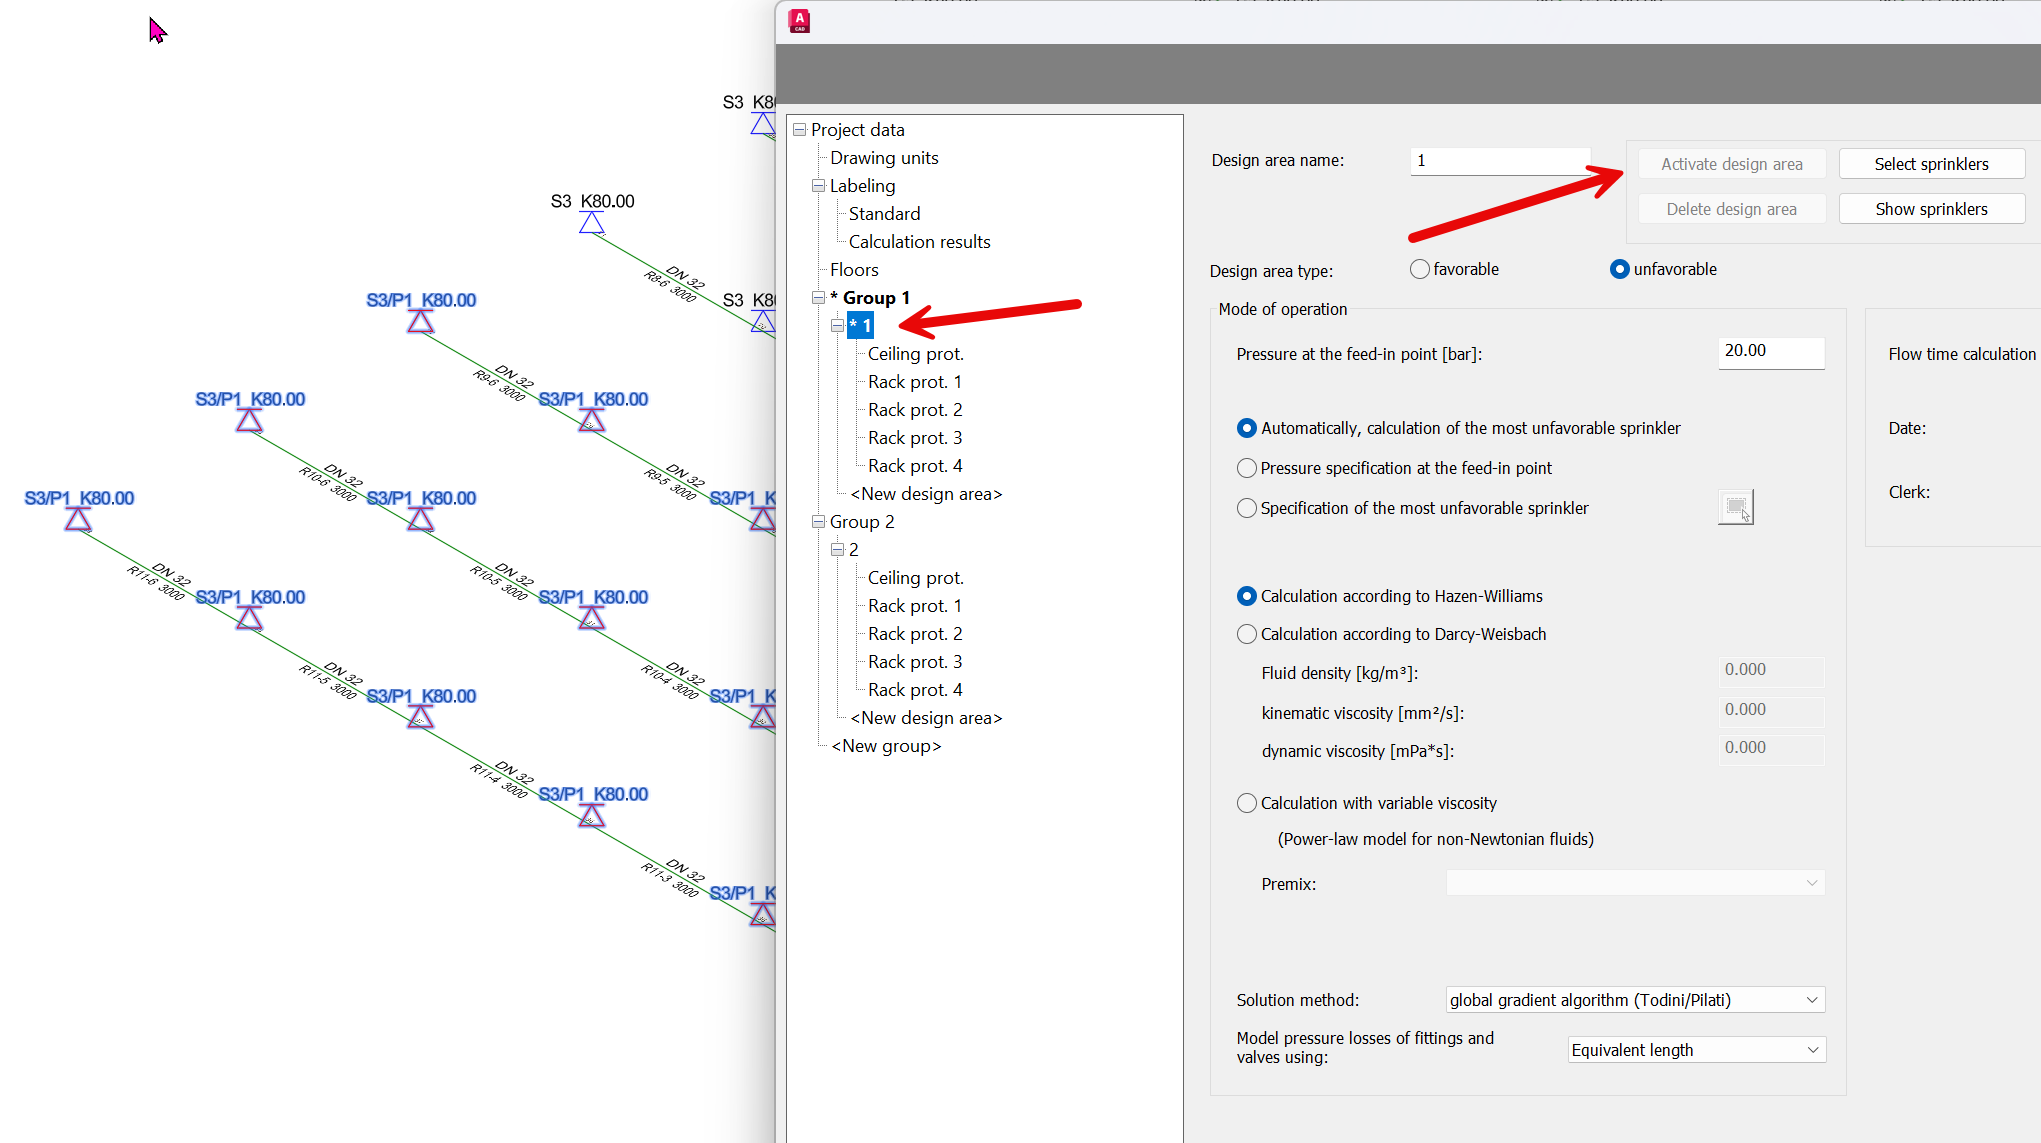
Start the calculation. Design area 1 is being calculated.
The “Non-supplied Areas” display visually what has not been calculated:
To calculate the second design area, activate and calculate it in the same way in Project Management/Design Area.