System types
In order for SpriCAD® for Revit to work properly, all system types belonging to the drawn sprinkler system must be assigned to the calculation programme so that they can be recognized.
Here it is extremely important to work cleanly in advance with Revit, especially if changes have been made.
Think about the constructional structure of your drawing before you start drawing with Revit.
Other systems which are a part of your drawing, such as sanitary or air conditioning, can be excluded from the calculation by not assigning them.
Here is an example of how a sprinkler system drawing can be structured:
1. Select

2. The following dialogue appears:
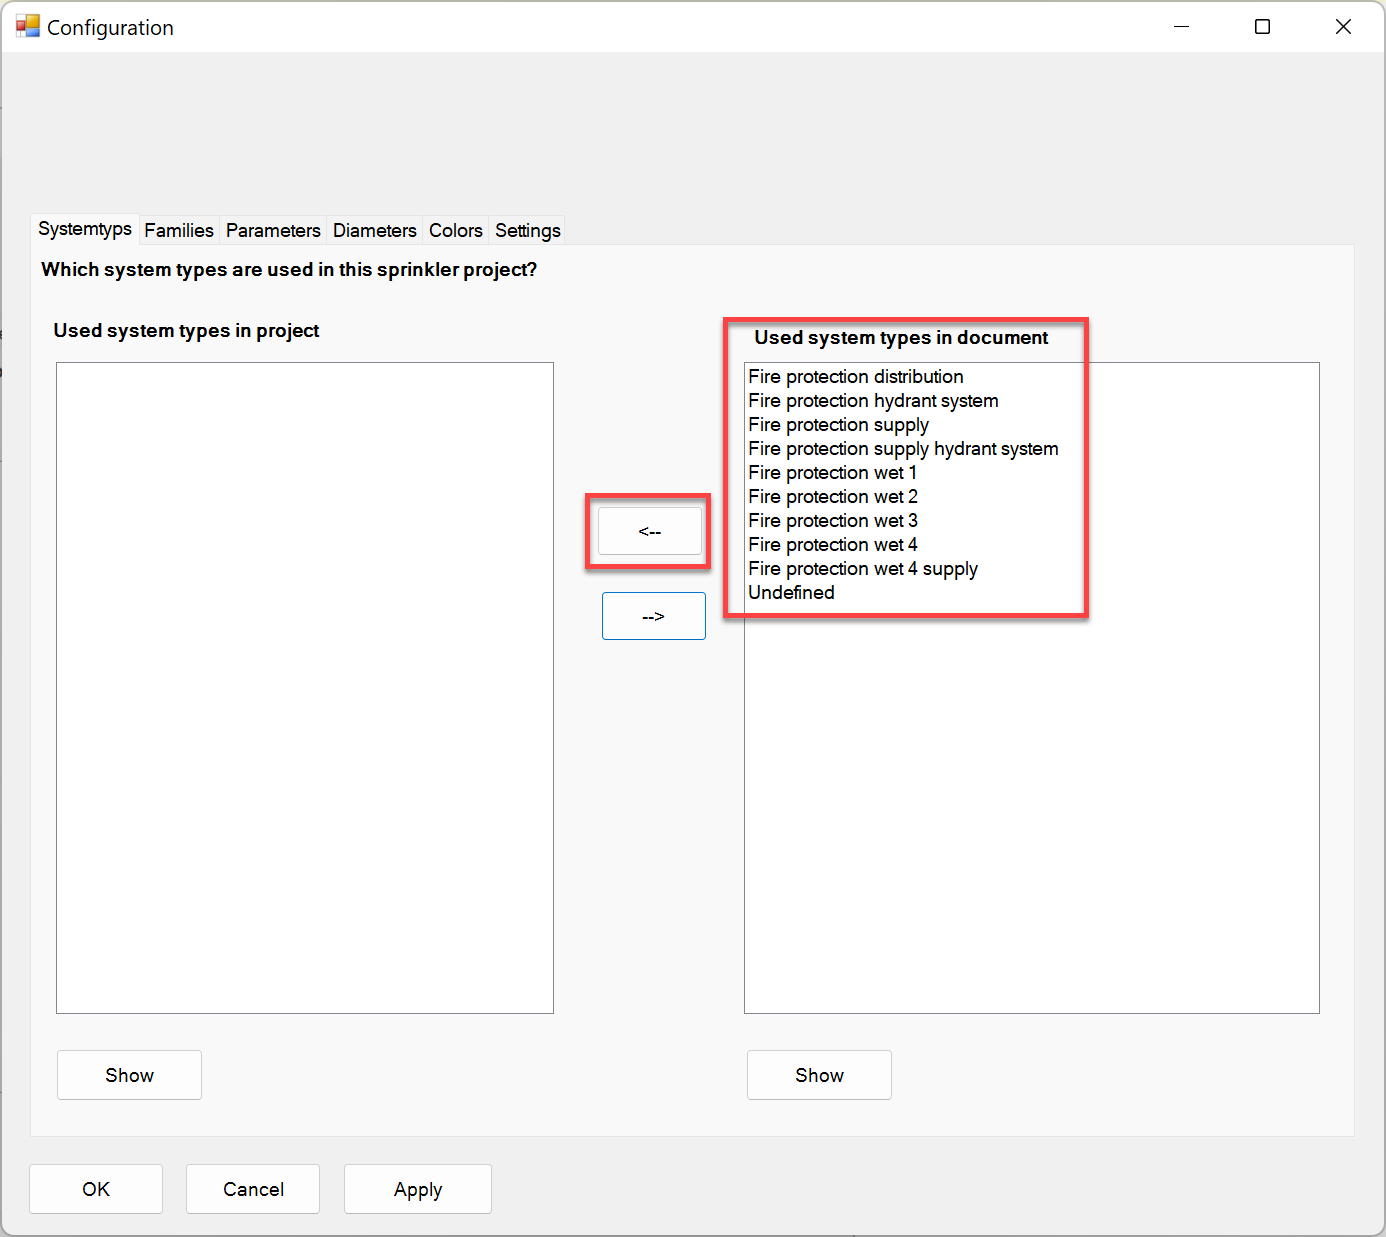
In the window on the right you will find the system types that were found in the document.
The example here is a pure sprinkler system drawing. The subdivision shows the groups 1-4 of a wet system.and there is a second system as hydrant system which has its own supply line (supply pipe hydrant system). Groups 1-3 have a common supply pipe and a common distribution pipe.
You can use the Show button to display which systems belong to the elements in your drawing.
Example:
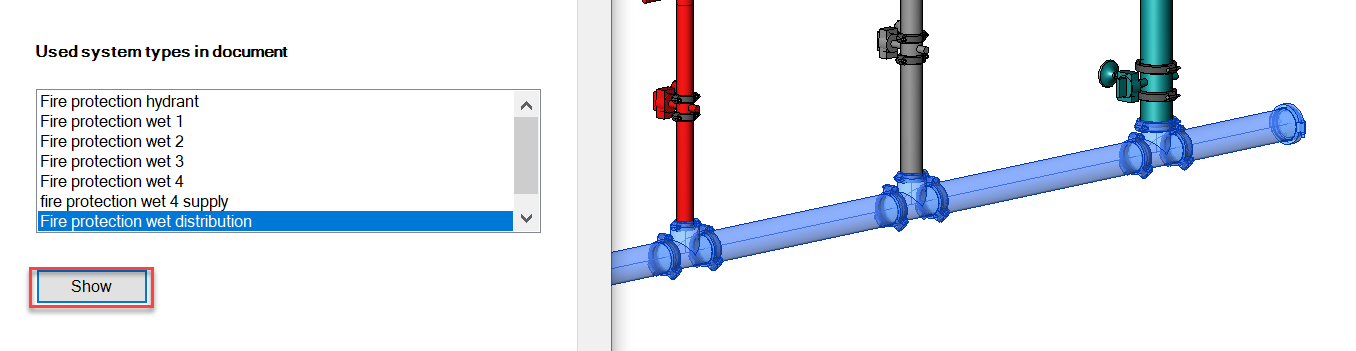
The supply pipe to group 1-3 is highlighted. Now you can decide whether it should be assigned.
After assigning the system types, turn to the "Families" tab.
Here, if not already done automatically, families may have to be assigned to the correct part types for the calculation.
This configuration is then saved automatically.